OK guys and gals,
I posted a picture of a gear toy that I made several years ago and "A" request was made for me to show greater detail of it.

I wasn't sure where to post it (patterns?) (tutorials?) (general?) but, IT IS A TOY so what better place to show it than here?

First, let me say that this ISN'T my pattern but, I did find out where I found it!

(your not going to believe this) It is a free pattern so, I feel OK with posting it (or where for you can find it.)
It is in a WOOD magazine from November 2012 issue 215! (I told you it had been a few years)

You may have to do some research to find the magazine though. Try friends that have been in woodworking for awhile or, the library or, write or call the magazine to see if you can get a back issue from November 2012.
Anyway, here goes another long winded "How I Did It" from Rog with pictures of course!
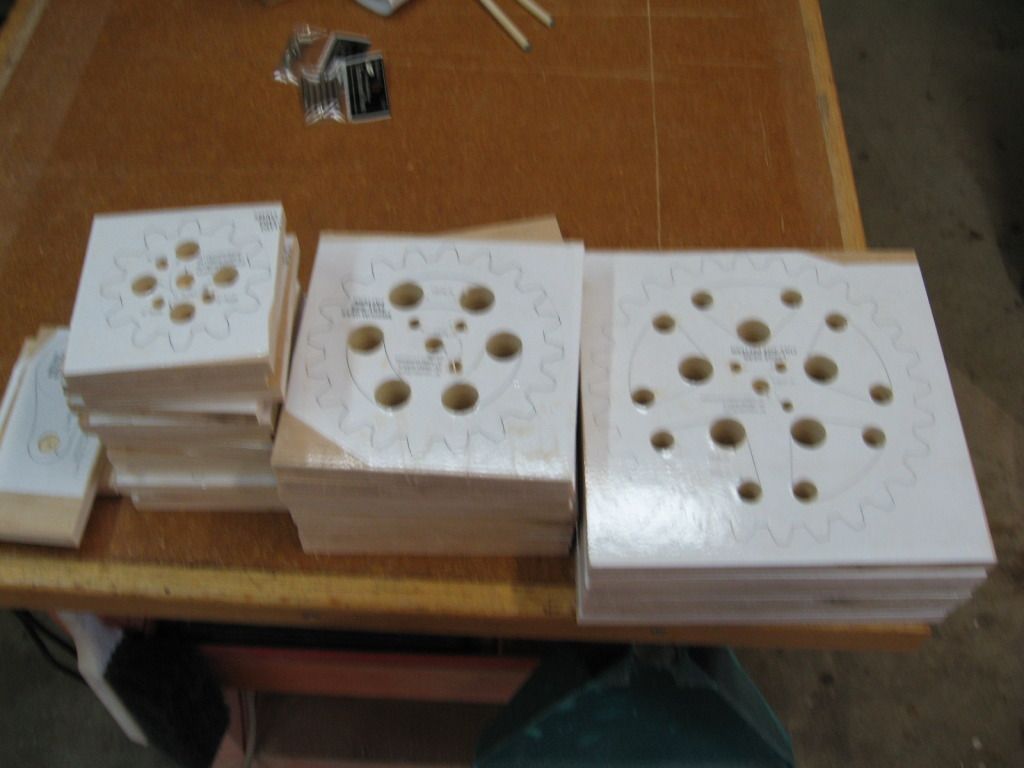
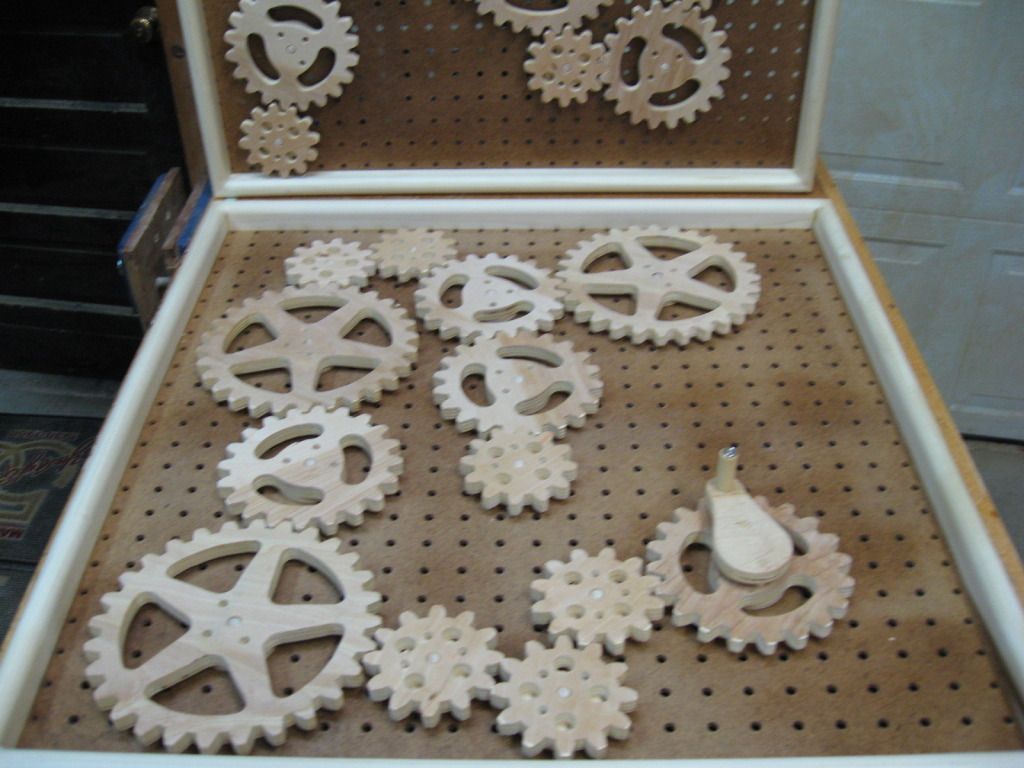
You are suppose to use 1/2" MDF according to the mag but, I used plywood of course. I also made more gears than you need to but, I over do everything (and I was making two of them)
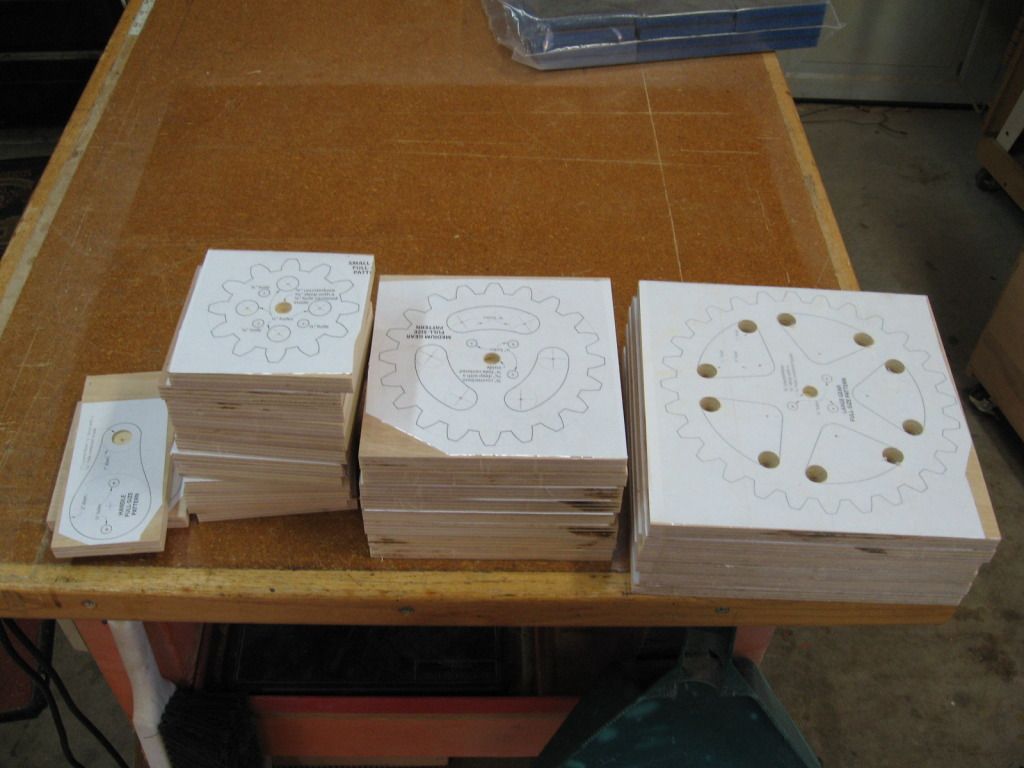
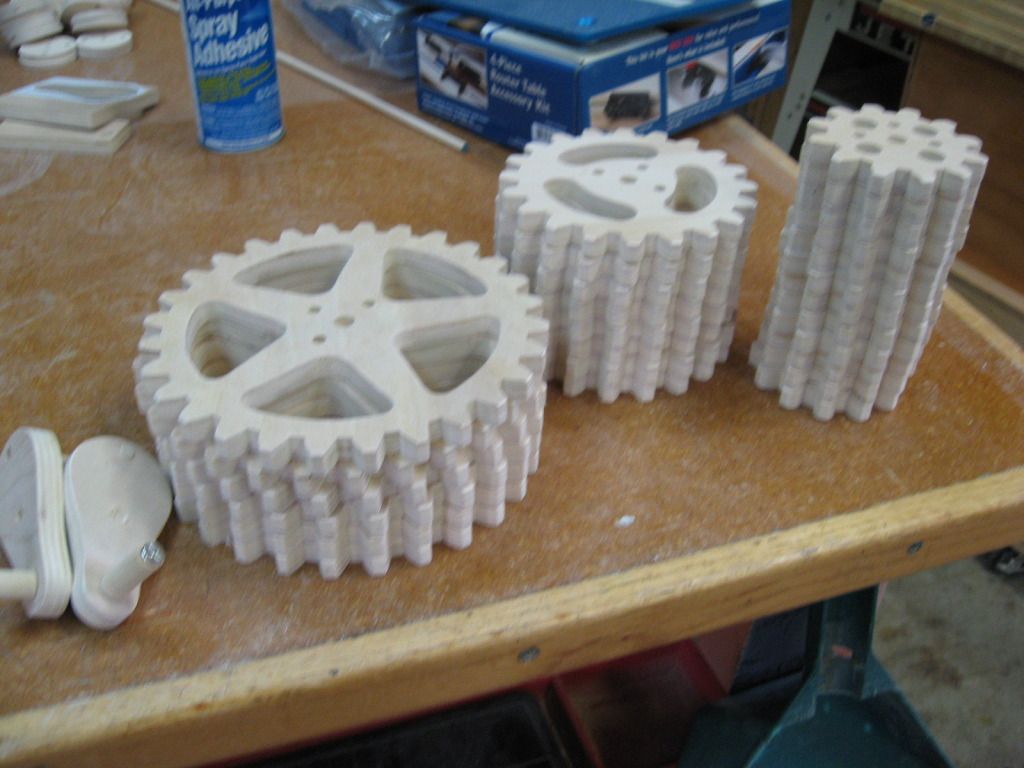
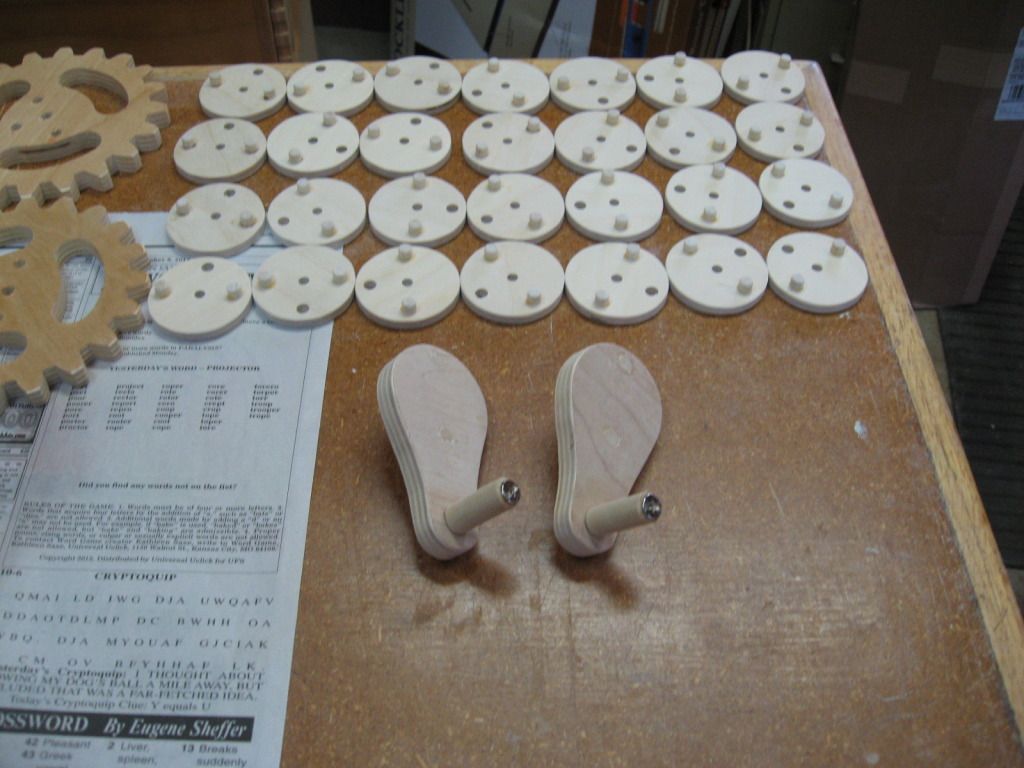
Each gear needs a "gear base" but, only one "crank handle" per set.
And of course some peg board for the backer. Use peg board with 1/4"holes and 1" spacing and a frame is not required but, it makes things nicer, more finished and easier to handle especially if you make the frame tall enough to cover with the gears in place.

A bit of finish on the gears (I recommend shellac for food safety reasons. Smaller people like to put things in their mouth you know.)
and you are good to go!
I notice by the pictures that it took me 8 days from start to finish

but, as I said, I was making two of them and I made a few more gears than necessary.
You just install the crank handle on top of one of the gears (your choice), make sure the cogs are interlocked with each gear and turn it and watch "SPINNING JOY" as each one turns in the opposite direction. And be sure to look at the face of the kid when he turns it!
Hope that helped. Now get started by finding the Wood magazine, copy the full sized patterns and make some saw dust and a kid happy!
Rog
PS I gave my grandsons theirs on Christmas 2012 and they are now 8 and 13 and still have the "Gear Set" in their play rooms and mess with them now and then.


